
A number of customers like to use various alias’s to authenticate into ISAM, up until recently, the primary way of achieving this, is via a Custom EAI, or some elaborate LDAP hackery.
Infomap, and the UserHelper capabilities, makes this a much easier affair.
Here is an example, where we use the infomap to authenticate based on a users email address (mail attribute) on their user object.
The logic is roughly:
- Instantiate a UserLookupHelper.
- Try and find the user based on their primary uid.
- If that doesn’t work, try searching for their Email address.
- Handle duplicates… (ie, fail out.)
- Return the native user id
- Attempt to authenticate the user with the supplied password.
importPackage(Packages.com.tivoli.am.fim.trustserver.sts.utilities);
importClass(Packages.com.ibm.security.access.user.UserLookupHelper);
importClass(Packages.com.ibm.security.access.user.User);
importClass(Packages.com.tivoli.am.fim.trustserver.sts.utilities.IDMappingExtUtils);

var username = context.get(Scope.REQUEST, "urn:ibm:security:asf:request:parameter", "username");
var password = context.get(Scope.REQUEST, "urn:ibm:security:asf:request:parameter", "password");

if(username == null || password == null) {
  //This is likely the first time through
  //Display the default template page here -
  //to challenge for the username and password
  success.setValue(false);
} else {
  //Second time around, or parameters provided directly.
  var hlpr = new UserLookupHelper();
  // Init with our AAC authsvc username/password config
  hlpr.init(true);

  // To use the ISAM Runtime configuration use:
  // hlpr.init(false);
  // And add admin credentials to the [bind-credentials] stanza of the
  // ldap.conf under the ISAM runtime.

  // Default Error message to display on failure
  var errorString = "Username or Password is incorrect.";
  //False unless told otherwise
  success.setValue(false);


  // First, try and get the user
  // If the entery provided was the username, we can use that.
  var user = hlpr.getUser(username);

  if(user == null) {
    //User wasn't found based on username entered
    //Try searching against email address.
    //Could be more specific here, like if it suited an email regex

    var searched = hlpr.search("mail",username,10);

    if(searched.length < 1) { // user not found } else if (searched.length > 1) {
      // It would seem that the email attribute isn't unique
      // Either do some magic, or just return a fail response.
      errorString = "Duplicate email found - cannot authenticate.";

    } else {
      //Just one result
      user = hlpr.getUserByNativeId(searched[0]);
      IDMappingExtUtils.traceString("Found user " + searched[0] + " from email "+ username +".");
    }
  } else {
    IDMappingExtUtils.traceString("Using username parameter directly.");
  }

  if(user != null) {
    //Found a user - try and authenticate
    var authn = user.authenticate(password);
    if(authn) {
      //Authentication has succeeded
      //Mark this mechanism as having completed.
      //Set the username attribute in the response token.
      //Add anything else you want to the cred here.
      context.set(Scope.SESSION, "urn:ibm:security:asf:response:token:attributes", "username", user.getId())
      success.setValue(true);
    } else {
      //Authentication has failed
      //Mark this mechanism unsuccessful.
      //This will return the configured default template.
      macros.put("@ERROR_MESSAGE@", errorString);
      success.setValue(false);
    }
  } else {
    //No user found by either means - throw generic error
    macros.put("@ERROR_MESSAGE@", errorString);
    success.setValue(false);
  }
}
To use this code, create a new mapping rule under Secure Access Control -> Mapping Rules.
Select Add, and paste the code in, supplying a name, and the type of “InfoMap”.

Optionally, create your own login.html template file – placing it in the Template Files directory on your appliance (be sure to send the username and password in the ‘username’ and ‘password’ request parameters), or for simplicity just reference the default username and password one from the existing module.
Create your new infomap mechanism, under Secure Access Control -> Authentication -> Mechanisms.

Supply a name, identifier and a description.

And configure it’s parameters to use the created mapping rule, and your desired template.
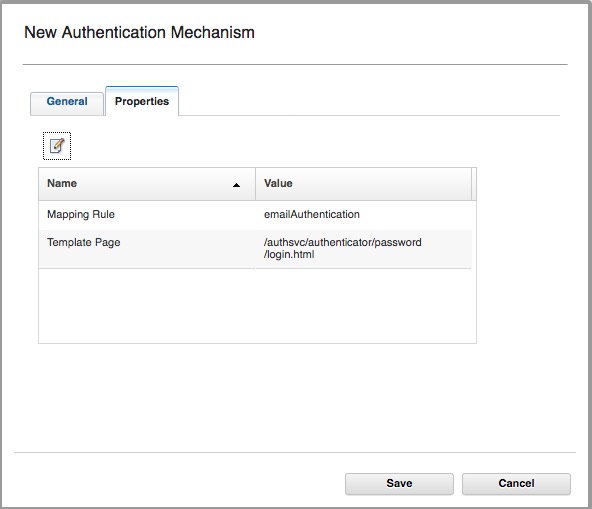
Note: you don’t need to supply the locale for the template page.
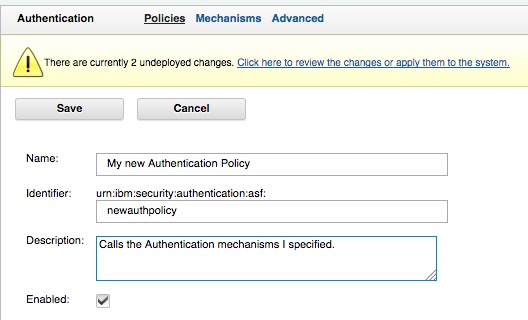
Finally, add your mechanism to an authentication policy, either on its own or part of a larger flow, and you’re done.
If you are using the mapping rule verbatim, you must configure the LDAP details in the username and password module such that it knows how to talk to your LDAP server, see a comparable set of steps – for OAuth ROPC:
https://philipnye.com/2015/02/23/isam-for-mobile-ropc-oauth-username-and-password-validation/
Or you can use the ISAM runtime configuration directly, adding bind details to the ldap.conf [bind-credentials] stanza.

Assuming you’ve run the isam configuration tool, to enable your webseal proxy instance for the Authentication Service, you can now access the url below- where the PolicyId is per the Policy ID you specified when you created the policy above:
https://<webseal IP>/mga/sps/authsvc?PolicyId=urn:ibm:security:authentication:asf:newauthpolicy
Set as ISAM Default Authentication Policy
If you wanted to make WebSEAL present this authentication policy as the policy for ALL authentications, you can easily make use of the Local Response Redirect for the login operation. See this article here for an example: ISAM Selective use of Local Response Redirect
Display a different Template Page Dynamically
In Infomap it’s possible to dynamically display a different page based on logic in your code, this is done by overriding the default template configured in the properties using the following line of code:
page.setValue("/authsvc/authenticator/password/someothertemplate.html");
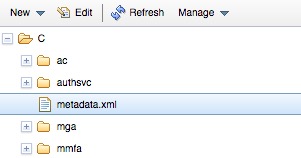
This can be used creatively to return different content (and formats – e.g. JSON vs HTML) depending on any number of factors. (Note, the content type header returned by ISAM is managed by the XML file metadata.xml)
Special thanks to Leo Farrell for the original scripting for this post.

Thanks for the script, I believe line 48 should read user = not userid =
LikeLike
I believe you are correct… 🙂
Thanks!
LikeLike
I realize this is a bit old but is there any way to do this with an external ldap instead?(Say I had another repository containing email.
LikeLike
Yes, but the directory would be configured as an ISAM federated directory.
LikeLike