
Sometimes its necessary to quickly setup a demo host with IBM Security Verify Access (ISVA) and you need something that will output some diagnostic information.
Introducing the https://resource-server-demo.verify.ibm.com/
This is an IBM Hosted demo host – that gives you some demo resources – so you can try out ACLs, or more elaborate configuration.
Setting it up can be done in 3 easy steps:
- Import the hosts Certificate into the pdsrv Keystore
- Deploy the changes and restart the reverse proxy
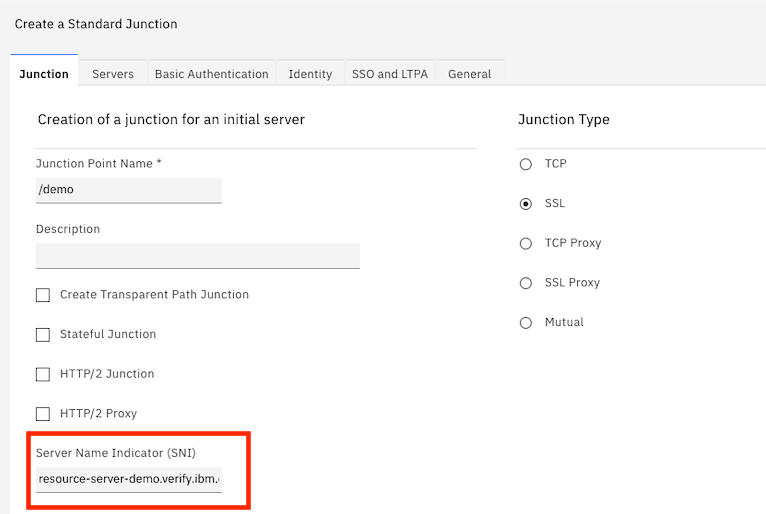
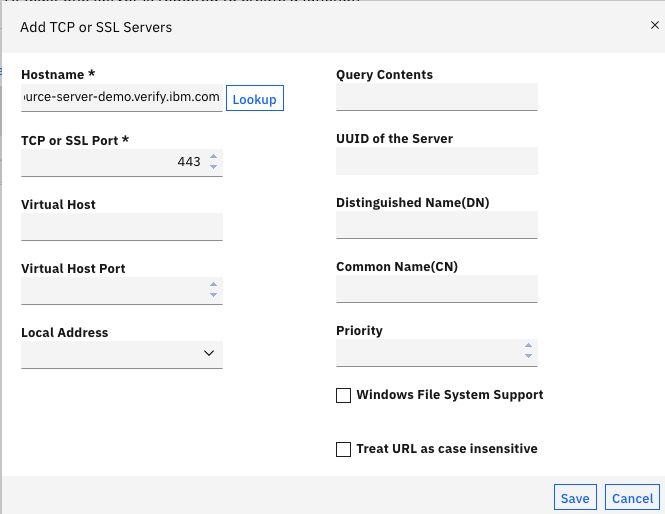
- Finally – Create a standard SSL Junction, being sure to supply the Server Name Indicator
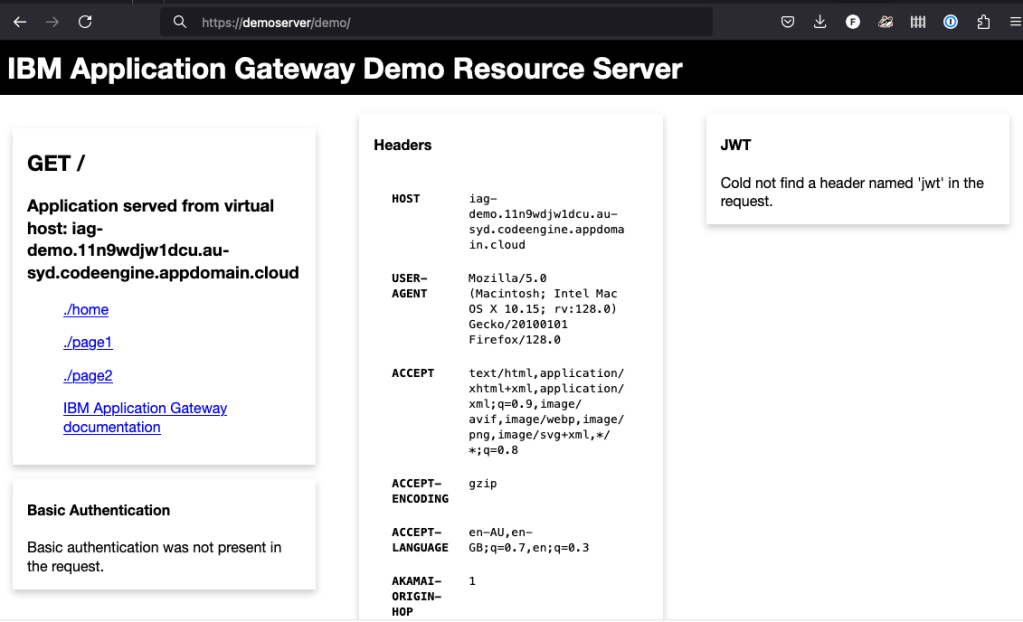
Then – after authenticating – access the site – https://<isva_host>/demo
Credential Viewer
Now – that might not be enough – perhaps you’re trying to troubleshoot whether something is added to the credential? Or are your groups getting loaded?
Try the ‘local-apps’ cred-viewer – define the path and enable it – in one simple configuration entry:
[local-apps]

# An example local application definition which enables the authorization
# decision API and makes this application available at the /aznapi path on the
# local junction:
#
# azn-decision = aznapi
#
# You can define your own path as the second parameter:
cred-viewer = creds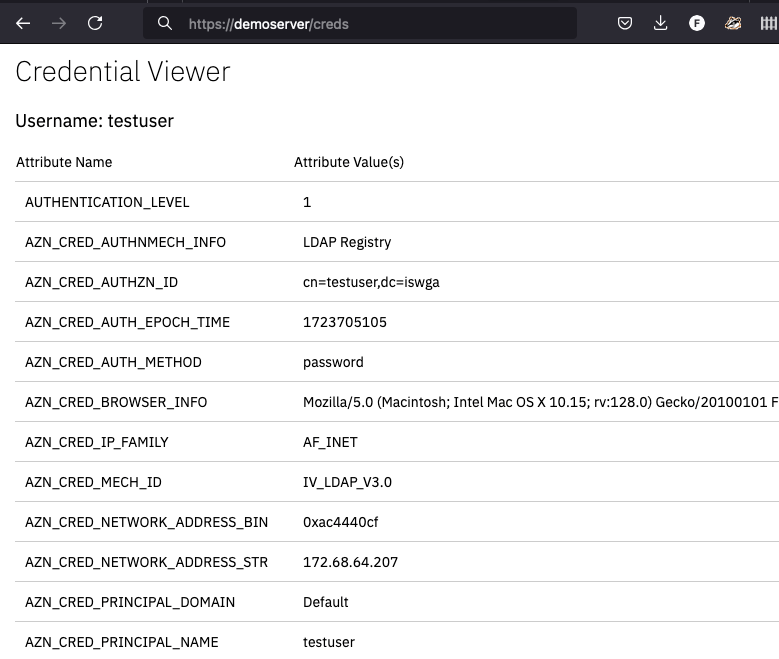
This is also available as a JSON response, and can be customized to only return specific attributes – so you can even get creative for production use cases!
[cred-viewer-app]

#
# Should we enable the embedded HTML page which can render the JSON data?
#

enable-embedded-html = true

# The rules which define the credential attributes which will be
# included in the response data.  The rule is of the format:
#
# [+|-]<attribute-name>
# where:
#     +:                indicates that the attribute should be
#                       included
#     -:                indicates that the attribute should not
#                       be included
#     <attribute-name>: the name of the attribute, which can also
#                       contain pattern matching characters
#                       (i.e. * ?)
#
# This entry may be repeated multiple times, once for each rule
# which is to be defined.
#
# Each attribute in the credential will be matched against each rule
# in order until a match is found.  The corresponding prefix (+|-)
# will then be used to control whether the attribute is included
# or excluded from the response data.  If no matching rule
# is found the attribute will be included in the response data.
#
# Example:
#  attribute-rule = -AUTHENTICATION_LEVEL
#
# The rule could alternatively contain the name of a single credential
# attribute whose value is used to define the attribute rules.  In this
# scenario each individual rule in the attribute should be separated by a
# space character.  If only a single attribute-rule configuration entry is
# defined, and the entry does not start with a '+' or '-' character, it will
# be used as the name of the credential attribute which contains the
# attribute rules.
attribute-rule =
Hope this helps – as these are things I use alot!
